Dry Before You Close: A Verified Rebuild Sequence for Finished Basements and Additions in Princeton Junction, NJ
Cal HewittPublished
- post mold remediation rebuild
- build back
- mold remediation
- new jersey
- princeton junction
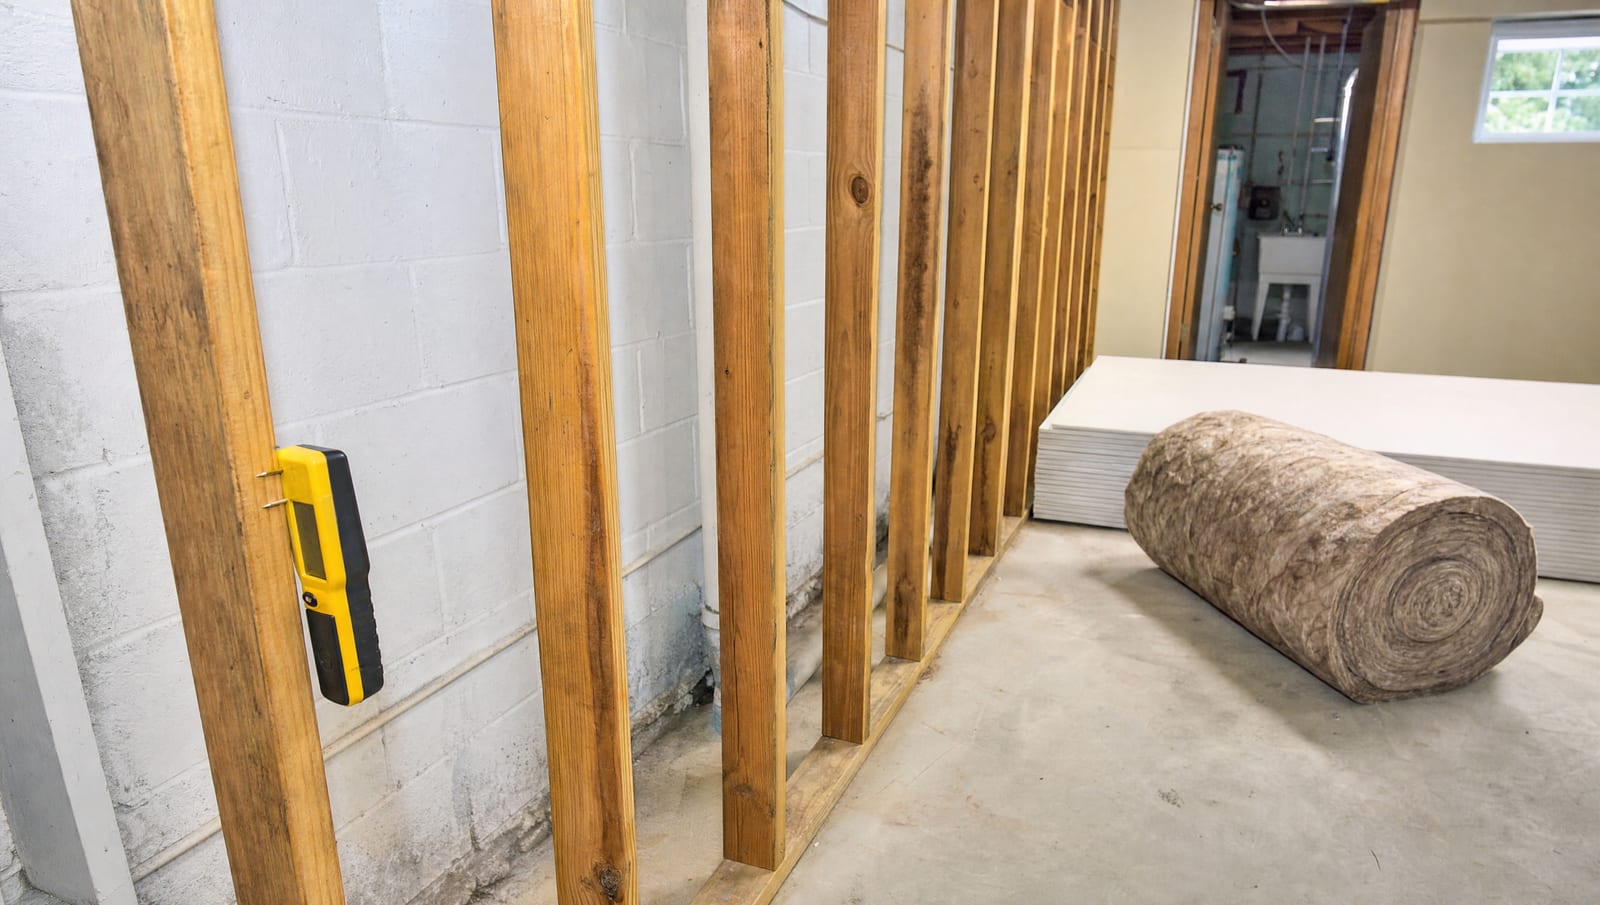
Clearance came back clean, the air scrubbers are packed up, and the finished basement or addition is a bare shell again with the mold gone. Now comes the part that decides whether the problem stays gone: the rebuild. Most people treat the rebuild as the easy stretch, the reward after the hard remediation work. In a finished basement or an addition, it is where a good project quietly goes wrong.
The most common rebuild failure is simple to describe. New drywall, insulation, flooring, and trim go up before the structure behind them is truly dry, or before the leak that caused the loss is actually corrected. The fresh finishes look perfect for a season. Then the odor returns, a baseboard goes soft, or a floor cups, and now the mold is growing behind materials that were installed only months ago. The rebuild did not fail because the wrong drywall was hung. It failed because the wall was closed while it was still wet.
This guide is about the rebuild done right in Princeton Junction homes. Not diagnosis, and not who owns which wall. Those come earlier. This is about the build-back itself: how to prove the space is dry to a measured standard before you close it, how to choose materials and assemblies that handle a damp-prone location, how to sequence the work so nothing gets sealed over water, and how to document it so the result holds up. Finished basements and additions are common construction around here, and they are exactly the assemblies that hide moisture best.
Why the Rebuild Is Where Moisture Gets Trapped
A finished basement or a finished addition is built to look like the rest of the house. Drywall, framing, insulation, flooring, and trim sit a few inches in front of concrete or over a slab, and that finished layer is very good at hiding what is behind it. During remediation, that layer is open. Framing is exposed, cavities are accessible, and a moisture meter can read the actual materials. The rebuild closes all of that back up.
If any residual moisture remains in the framing, the slab, or the concrete when the finishes go back on, the new wall becomes a lid. Warm indoor air can no longer help dry the assembly, the cavity stays damp, and the organic material in new drywall and paper facings gives returning mold something to feed on. The EPA is consistent that controlling moisture is the only reliable way to control mold, and closing a wall wet does the opposite. It preserves the exact condition remediation was supposed to remove.
That is why the rebuild has a gate in front of it. You do not start build-back on a schedule. You start it when the readings say the structure is dry and the source is fixed, and not before.
The Gate: Prove It Is Dry Before You Close
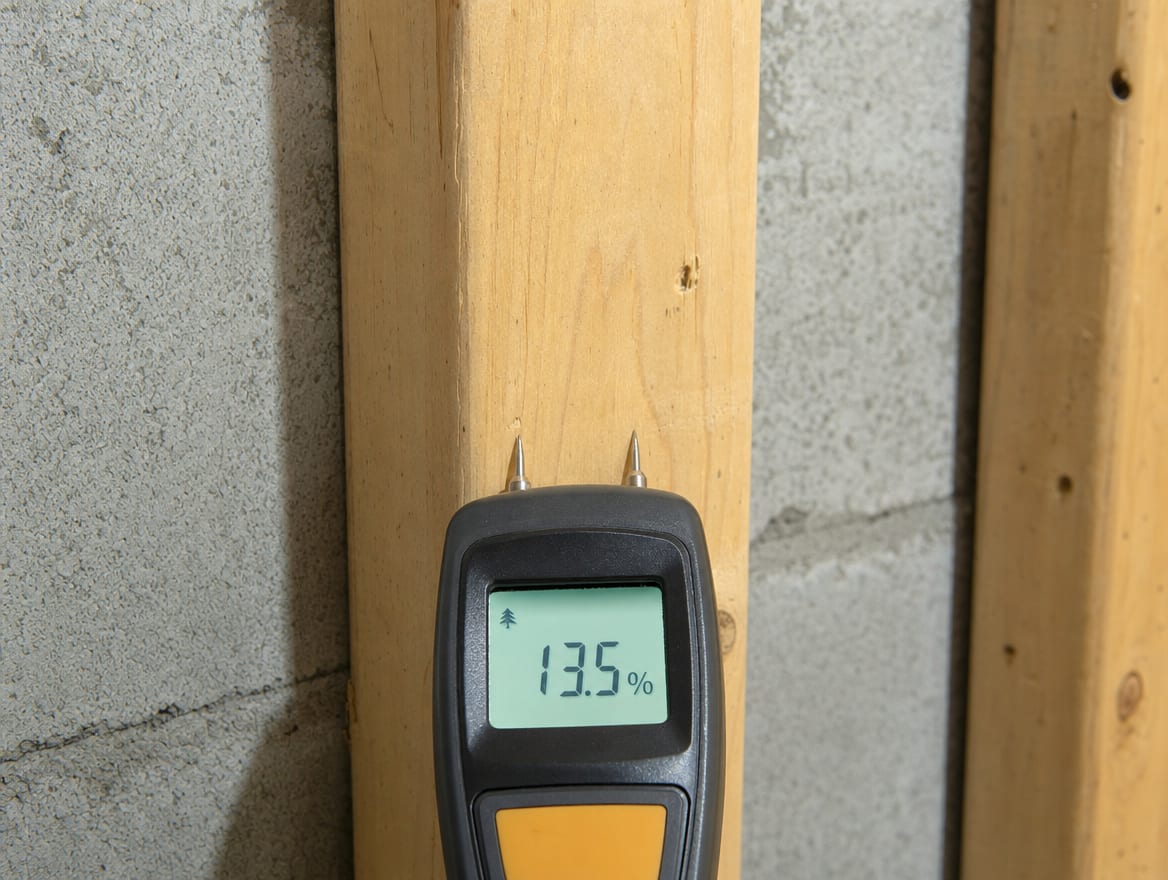
The single rule that separates a rebuild that lasts from one that comes back is this: verified dryness comes before any finish goes on. Not a dry feeling in the room. Not a dehumidifier that has been running for a week. Documented moisture readings that meet a target on the actual materials, framing, slab, and concrete, confirmed by a meter rather than by how the air feels.
Each stage of the build-back has a check that has to pass before that stage begins. Skip a check and the failure does not show up right away. It shows up later, behind a finish that is expensive to open again.
Hover or tap a row to highlight it.
| Rebuild stage | Check that must pass first | What goes wrong if you skip it |
|---|---|---|
| Verify dryness and clearance | Moisture readings meet a documented dry target and remediation clearance is confirmed | New materials seal in moisture and growth that were never fully resolved |
| Moisture-safe material choice | Materials and assemblies suit a damp-prone, below-grade, or previously wet space | Absorbent, paper-faced finishes give any returning moisture something to feed on |
| Rough build-back | Framing and cavities read dry and the moisture source is corrected | Insulation and drywall trap water against wood, hidden from view |
| Finish work | Flooring and trim have acclimated and the substrate tests dry | Trapped vapor cups floors, lifts trim, and stains fresh paint |
| Closeout | Final readings, source repair, and records are complete | No proof the space was dry, which weakens a claim, a sale, or the next diagnosis |
The gate is not extra caution for its own sake. It is the difference between a documented post-mold remediation rebuild that reads as thorough and a fresh wall that becomes next year's problem.
Correct the Source Before You Rebuild
Dryness and source correction are two separate checks, and both have to clear. A structure can be dried to target today and get wet again next month if the leak, the grading, the plumbing defect, or the drainage problem that caused the loss is still active. Drying removes the water that is there now. Source correction stops the next batch from arriving.
In practice that means the moisture pathway is repaired, or formally assigned to the right trade, before the finishes go back on. A remediator handles containment, removal, drying, and verification. The plumbing, drainage, or grading repair may belong to another trade entirely. What matters for the rebuild is that the correction is done and confirmed, not promised for later. Building over an uncorrected source is the same mistake as building over wet framing. The wall looks finished and the water keeps coming.
Choosing Moisture-Safe Materials and Assemblies
Once the space is dry and the source is fixed, the next decision is what to put back and how to put it together. A finished basement or a below-grade addition lives in a damper environment than an upstairs bedroom, and the rebuild should respect that. The goal is an assembly that can handle normal humidity and, if it ever does get wet again, dry out instead of holding water against wood.
None of this replaces the manufacturer's guidance or the local code. Material choices and wall assemblies for a below-grade or previously wet space should be confirmed against product instructions and the authority having jurisdiction, because the right build-up depends on the specific location and construction.
Rebuilding Without Trapping Moisture
Confirm the dry standard by reading
Framing, slab, and concrete are checked with a moisture meter against a documented target, not judged by how the room feels, before any material goes back.
Correct the source first
The leak, drainage, or grading defect that caused the loss is repaired or assigned to the right trade, so the new wall is not built over active water.
Choose moisture-safe insulation and assemblies
Materials and wall build-ups suited to a damp-prone or below-grade space are selected and confirmed against manufacturer and code guidance.
Never seal wet framing
Drywall and insulation are held back until the structure behind them reads dry, so nothing gets closed in over residual moisture.
Let finishes acclimate
Flooring and wood trim are allowed to adjust to the space and the substrate is confirmed dry, so the finish does not cup or lift after installation.
Verify before the final layer
A dryness check, and independent verification where a project calls for it, is documented before the space is closed up.
Keep the records
Readings, drying logs, source repairs, and photos are saved so the rebuild can be shown to be dry, not just assumed to be.
The principle underneath every one of those points is the same. New finishes should never be the thing that hides moisture. If a material or an assembly can trap water where no one can see it, it belongs on the wrong side of the dry-first gate.
Sequencing the Build-Back So Nothing Gets Sealed Wet
Order matters as much as material choice. A rebuild that installs things in the wrong sequence can pass every individual check and still trap moisture, because a later step closes over an earlier one before it was confirmed dry. The sequence below keeps each layer open until the layer behind it has cleared.
The Verification-Gated Rebuild
- 1
Confirm remediation completion
Verify that cleanup is finished and that remediation clearance criteria are met before any rebuild planning begins.
- 2
Correct the moisture source
Repair the leak, drainage, plumbing, or grading defect, or assign it to the responsible trade, and confirm the correction.
- 3
Dry the structure to a target
Bring framing, slab, and concrete to a documented dry standard, confirmed by moisture readings rather than by feel.
- 4
Verify before closing
Take final readings and, where a project warrants it, bring in independent verification to document the space is dry before finishes go on.
- 5
Rough build-back
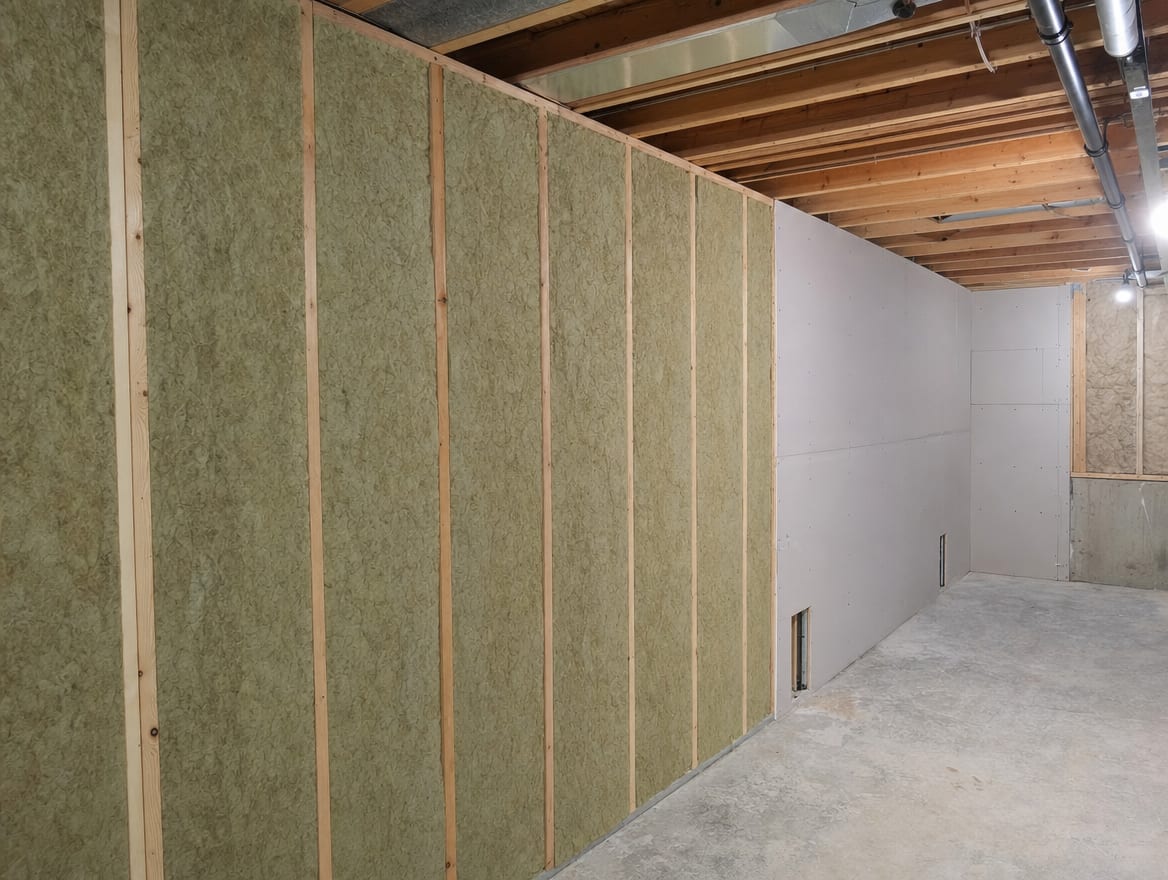
Install insulation and hang drywall only after the cavity behind it reads dry and the source is corrected.
- 6
Acclimate and finish
Let flooring and trim adjust to the space, confirm the substrate is dry, then install finishes, and paint.
- 7
Final check and closeout
Record final conditions, the source repair, and the completed work so the rebuild is documented end to end.
The habit that protects the whole sequence is refusing to close a layer you have not confirmed. Insulation waits for a dry cavity. Drywall waits for the source repair. Flooring waits for a dry slab and an acclimated material. Every time a step gets closed early to save a day, the risk moves out of sight, which is the worst place for it to be.
Where more than one party has a stake in the result, such as an insurance claim or a sale, an independent post-remediation verification before the finishes go on gives the whole rebuild a documented starting point that everyone can rely on.
Local Points to Confirm in Princeton Junction
Princeton Junction is a community within West Windsor Township, not a separate municipality, so permit and code questions for a rebuild route through West Windsor. When a build-back involves framing, electrical, plumbing, or other permitted work, confirm what applies through the township's construction and engineering offices before the work starts. Requirements depend on the specific scope, so verify them with the authority having jurisdiction rather than assuming.
Two more local realities are worth checking by address, not by neighborhood. Older regulated materials such as lead paint or asbestos may be present depending on the age of the home, and disturbing them carries its own rules. And some parcels near streams, wetlands, or low-lying drainage sit differently on flood and site maps than their neighbors do. FEMA address-level mapping and NJDEP flood tools are checked by parcel, because no single flood or permit condition applies to every property in Princeton Junction.
Document the Rebuild
The space should not be closed back up until the conditions and the work are on paper. Good records are what let a finished rebuild be shown to be dry rather than simply assumed to be, and they are what protect the owner during an insurance claim, a real estate sale, or a future question about the home.
Worth keeping: the moisture readings and drying logs that show the structure met a dry target, the confirmation that remediation clearance was met, the record of the source repair and which trade performed it, any verification report, photos before and after the finishes went on, the written scope, and the invoices. Insurance coverage depends on the policy language and the documented cause of loss, and a contractor cannot guarantee it, so complete records from the start give a claim its best footing. Remediation and a careful rebuild also cannot guarantee a change in property value, but clear documentation is what demonstrates the space was returned to a dry, finished condition the right way.
Frequently Asked Questions
How do I know it is dry enough to rebuild?
By reading, not by feel. Framing, slab, and concrete are checked with a moisture meter against a documented dry target, and the space is confirmed to have met remediation clearance. A room can feel dry while the base of a wall or the slab still holds enough moisture to feed growth once it is closed up. The reading is the answer, and it should be written down before any finish goes on.
Why did mold come back after my last rebuild?
The two most common reasons are closing the wall before the structure was truly dry, and rebuilding before the moisture source was corrected. In both cases the finishes look fine at first, then the odor or a soft spot returns because the water was either sealed in or still arriving. Fresh drywall and paper facings give returning moisture something to feed on, so the growth shows up behind materials that are only months old.
What materials resist moisture in a rebuilt basement?
The right answer depends on the space, so it is confirmed against manufacturer guidance and local code rather than assumed. In general, a rebuild in a damp-prone or below-grade area does better with materials and wall assemblies chosen to handle humidity and to dry out if they get wet, instead of absorbent, paper-faced finishes that hold water where no one can see it. The assembly matters as much as any single product.
When can the rebuild actually start?
After the moisture source is corrected and the structure is verified dry against a documented standard, and after remediation clearance is met. That is the gate. Emergency stabilization and drying can begin promptly, but the finish work waits until the readings and the source repair both clear. There is no fixed number of days, because the timeline depends on the extent of the damage and how long the structure takes to dry.
Will insurance cover the rebuild?
Only your carrier can decide, based on your specific policy, the documented cause of loss, and any exclusions. A contractor cannot guarantee coverage. What helps is documentation from the beginning: the readings, the drying logs, the source repair, photos, and a clear written scope, so the claim rests on a complete record of what was found, corrected, dried, verified, and rebuilt.
When your mold project is cleared and it is time to rebuild a finished basement or an addition the right way, the goal is simple: prove it is dry, fix the source, then close it up, all on paper. ExecPro Restoration & Cleaning serves Princeton Junction and the West Windsor area with mold remediation across Princeton Junction and a documented, verification-gated build-back, from final moisture readings and source coordination through insulation, drywall, flooring, and trim. Call our team at (888) 300-3772 or reach out through our contact page to plan a rebuild that stays dry behind the walls.
Rebuild and Dryness Terms
Tap a term to see what it means.
Dry standard. A documented moisture target that framing, slab, and concrete must reach, confirmed by meter readings, before any finish is installed.
Serving Princeton Junction
ExecPro Restoration & Cleaning provides mold remediation services in Princeton Junction, NJ, from inspection and testing through removal, drying, and post-remediation verification. Call (888) 300-3772 for 24/7 emergency response.
Related Articles
Where Remediation Ends and Construction Begins: Post-Mold Rebuild in Livingston, NJ
Containment comes down and a Livingston, NJ property stops being a remediation site and becomes a construction one. That handoff has its own rules.
Post-Mold Rebuild in Deal NJ: Planning the Build-Back Around the Summer Moratorium
After mold clears in a Deal NJ home, the build-back begins. Learn to schedule regulated construction around the summer moratorium and match high-value finishes.
Post-Mold Remediation Rebuild in Princeton, NJ: A Preservation-Aware Plan for Older Homes
Rebuilding an older Princeton NJ home after mold remediation? Learn how to restore original character, review lead and asbestos, and rebuild without trapping moisture.